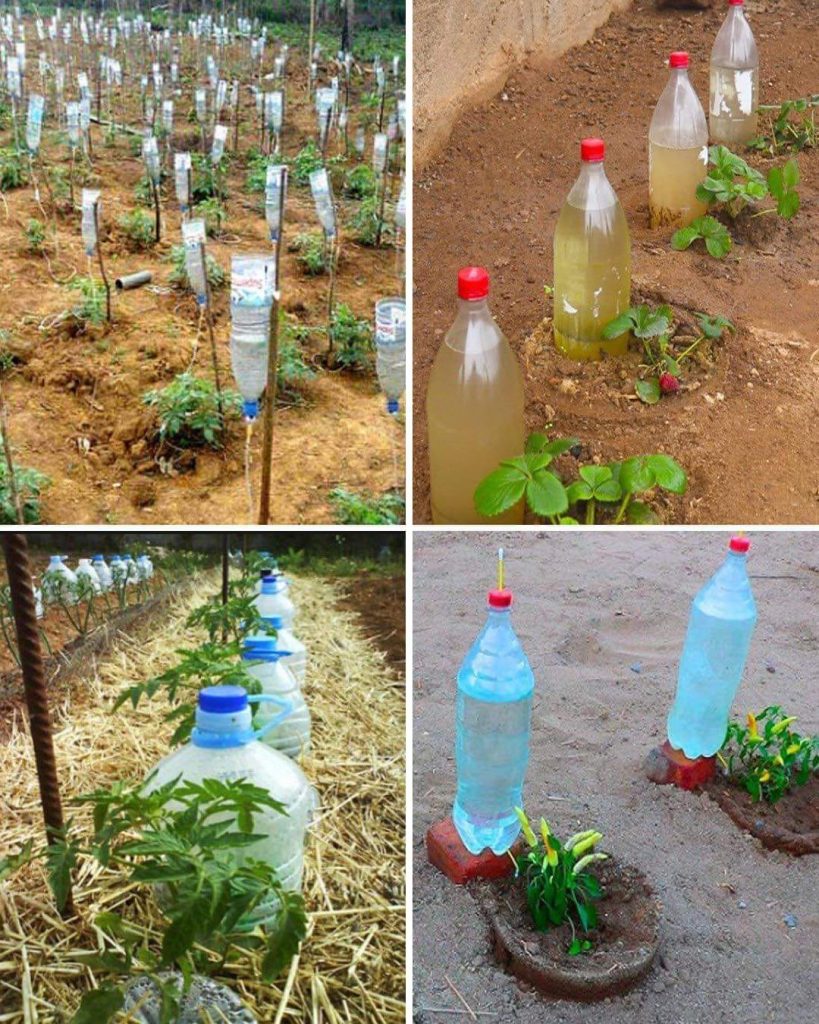
If you want to keep your plants hydrated without spending much, this super easy DIY drip irrigation system is perfect! With just a few household items and 10 cents, you can create an efficient watering system in minutes.
🛠 Materials Needed:
✅ Plastic bottle (1–2 liters)
✅ Nail or needle (to make small holes)
✅ Knife or scissors (to cut the bottle)
✅ Water
🚀 Step-by-Step Guide
Step 1: Prepare the Plastic Bottle
1️⃣ Take an empty plastic bottle (soda or water bottle).
2️⃣ Remove the label and clean the bottle thoroughly.
Step 2: Poke Tiny Holes
1️⃣ Use a needle, pin, or small nail to poke 3–5 small holes near the bottom of the bottle.
2️⃣ Ensure the holes are small to create a slow drip effect.
Step 3: Bury or Position the Bottle
1️⃣ Option 1:
- Dig a small hole near your plant and bury the bottle halfway into the soil (cap side up).
2️⃣ Option 2: - Place the bottle upright next to the plant with the bottom holes facing the roots.
Step 4: Fill with Water & Cap It
1️⃣ Fill the bottle with clean water.
2️⃣ Lightly screw on the cap to control the water flow. (Looser = faster drip, tighter = slower drip).
🌱 Why This DIY Drip Irrigation Works:
✅ Conserves Water – Provides slow and steady hydration to the roots.
✅ Saves Time – No need for daily watering!
✅ Cost-Effective – Uses recycled materials, costing almost nothing.
✅ Prevents Overwatering – Delivers water directly to roots without waste